The back of the ukulele was fairly easy to complete. Trimming the back braces were like trimming the soundboard. Like the soundboard, I did not cut the braces to width till I could mark the areas that intersects with the ukulele side. During the dry fit, I lightly marked the area that would be visible from the sound hole. This help me placed my label/signature on the back. I just used a permanent marker thanking my wife for the kit and signing my name.

Since I had a chisel in hand from trimming the braces, I just used the chisel to trim the sides down to the lining. A hand plane would have been better as it would keep the trim nice and flat. My chisel trim wasn't perfectly flat but that didn't matter a whole lot since the back was sanded flat afterwards. There probably would be less sanding if a hand plane was used.

After back edge was trimmed and sanded flat, my youngest inspected the inside.

Then she inspected the outside.

When I glued up the top to the sides, the side was not perfectly perpendicular to the base. This resulted in the top being a little larger than the base. I was not able to put the ukulele topside down in the jig for gluing the back on. This is why many who have built this kit suggest you make a mold instead of a jig. I ended up gluing the back without the jig and a bunch of hand clamps.

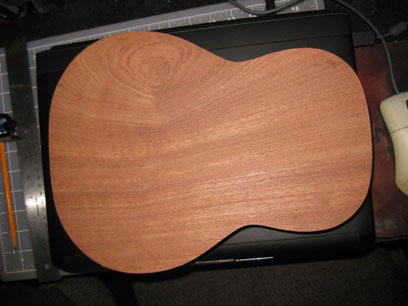
After a day of drying, I trimmed the back with trim router. Things looked like they turned out okay. The ukulele is starting to look like a ukulele now.


Next up should be working on the neck.

Since I had a chisel in hand from trimming the braces, I just used the chisel to trim the sides down to the lining. A hand plane would have been better as it would keep the trim nice and flat. My chisel trim wasn't perfectly flat but that didn't matter a whole lot since the back was sanded flat afterwards. There probably would be less sanding if a hand plane was used.

After back edge was trimmed and sanded flat, my youngest inspected the inside.

Then she inspected the outside.

When I glued up the top to the sides, the side was not perfectly perpendicular to the base. This resulted in the top being a little larger than the base. I was not able to put the ukulele topside down in the jig for gluing the back on. This is why many who have built this kit suggest you make a mold instead of a jig. I ended up gluing the back without the jig and a bunch of hand clamps.

After a day of drying, I trimmed the back with trim router. Things looked like they turned out okay. The ukulele is starting to look like a ukulele now.

Next up should be working on the neck.
Comments